|
(Extracts from my PhD Thesis) This series of posts provides a step-by-step description of the construction and conversion processes involved in building the Container of Dreams. They outline my studio investigations and experimentation and document both accomplishments and failures experienced throughout the project. Part 3: Exterior CladdingAs the container is made of high strength corten steel I knew that it would prove difficult to attach stud framing to both the inside and outside of the container. The stud framing is necessary to enable me to attach the external and internal coverings. I had never worked with corten steel before so I explored a few possibilities of how to proceed. The first two options included the welding of steel studs to the exterior or welding steel brackets to attach timber studs to enable the application of the outside cladding. The third option, to drill through the steel and attach stud timbers with the use of bolts and nuts, was the one that I decided was the simplest and therefore the one I would evaluate first. I began tentatively to drill the first hole on the container. This was experimental research as I was unsure whether I would be able to drill through the steel without difficulty. If it was unproblematic then this was the simplest and most achievable way for me to accomplish the conversion of the container. If the drilling was going to prove difficult then it would require the alternative option of welding plates and brackets. This would develop into a much more challenging procedure as it would require relying on third parties to facilitate the welding process. 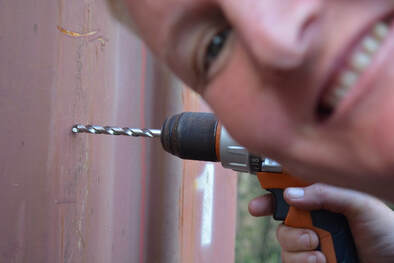 Drilling holes in the container walls I am pleased to report that the drilling of holes was discovered to be a reasonably trouble-free procedure. I had purchased high tensile steel drill bits of the required size for the bolts, in this case 5/16. I consulted with the store assistant who recommended a certain brand as being better quality and therefore longer lasting than other available brands. He also recommended that when carrying out the drilling process, I should be aware that I exercise caution and drill slowly and steadily so as not to blunt the drill bit prematurely. Following this advice, I managed to drill through the strong steel of the shipping container quite easily and so proceeded to continue to drill several more of the required holes. Since carrying out this exercise and while undertaking a separate construction task on the container, I have been advised by my friend John Raymond, a retired master tradesperson, that drilling holes through corten steel is made even easier by using a smaller drill bit as a pilot hole then using the larger drill bit to open up the drilled hole to the size required. This proved to be a much easier and faster way of executing this task. Once the holes were drilled, I then attached vertical timber studs to both the inside and outside of the container walls. I drilled matching holes through the timber and then attached these timbers to the walls using bolts placed through the drilled holes in the container walls. This resulted with the internal stud corresponding to the external stud with the steel of the container walls sandwiched in-between. 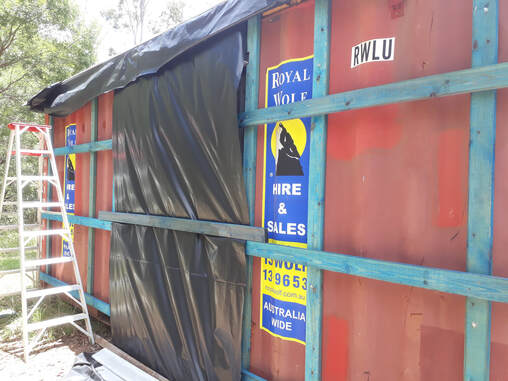 Eastern wall showing timber framing in place After the timber stud framing was bolted into place, it was necessary to attach horizontal timber framing to these wall studs to enable the attachment of the cladding material. The vertical timbers were attached using high quality metal screws specifically manufactured for use in outdoor applications to ensure optimum strength when fixing the heavy exterior cladding material to the structure. Insulation material, generously donated to the project by CSR Bradford, was then interleaved between the framing timbers and the entire area was then enclosed with builder’s film as a supplementary measure of protection from the elements. 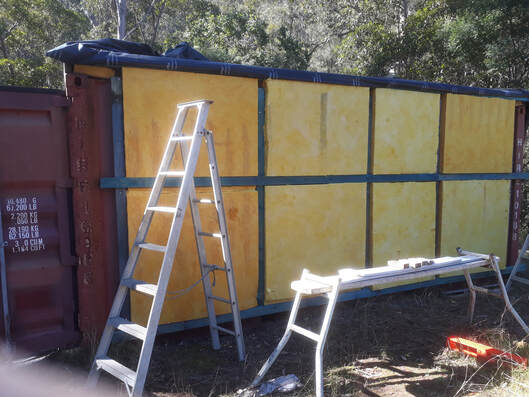 Insulation between timber framing ready for exterior cladding on western wall I had many concerns about the use of the Inex wall board for the cladding of the building. As I had previously attempted to use this product for lining the roof, and failed in my attempts, I was apprehensive about its effective operation in this situation. For a second time, I determined that another pair of hands was necessary so, again, I engaged my partner Cass, to assist me to move the wallboard sheets into their required position. We both handled the sheets of wall board easily enough and without incident this time. Although heavy and awkward due to their size, we managed to manoeuvre them in to place and fix to the structure without too much difficulty. Each sheet was placed vertically next to the previous one and secured into place with masonry self-drilling screws. 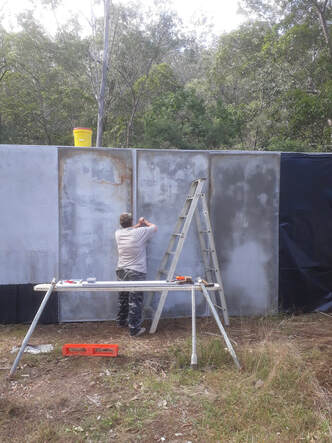 fixing the wallboard into position on the exterior of the container I then had some choices to make in regard to how I managed the final covering of the exterior walls of the container. Due to the donated products I had on hand I decided to go with two different looks, one on each side of the container, to showcase the varying appearances that can be achieved by using alternative materials in unconventional applications. In addition, as this was also a visual art project, I wanted the surface treatment of the container exterior to deliver a convincing aesthetic. In Part 4, next week, I will discuss the cladding choice applied to the Western and End walls, and some of my experimentation with this.
2 Comments
Tom Kiss
4/1/2021 02:55:29 am
Awesome project. Well done. Do you have any 'finished project' pictures. 11/7/2022 03:04:54 pm
We talked with a rep from Sheldon Bosley Knight, that is an estate representative and also understands about contemporary residences being developed today, Leave a Reply. |
Clare UrquhartCEO and Founder Archives
March 2020
Categories |
 RSS Feed