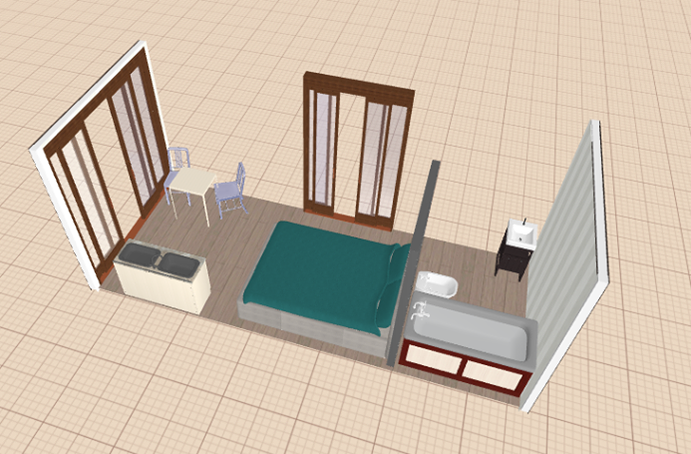
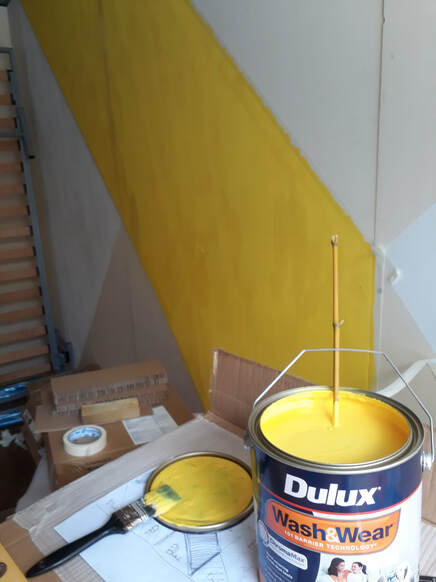
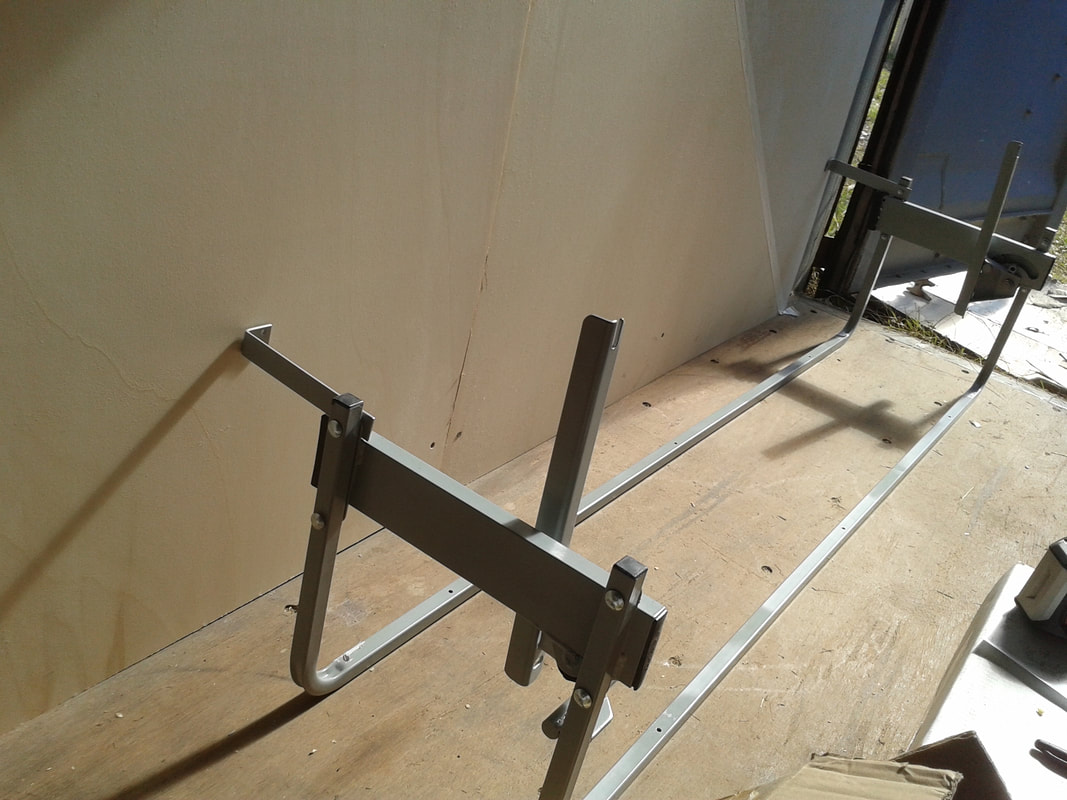
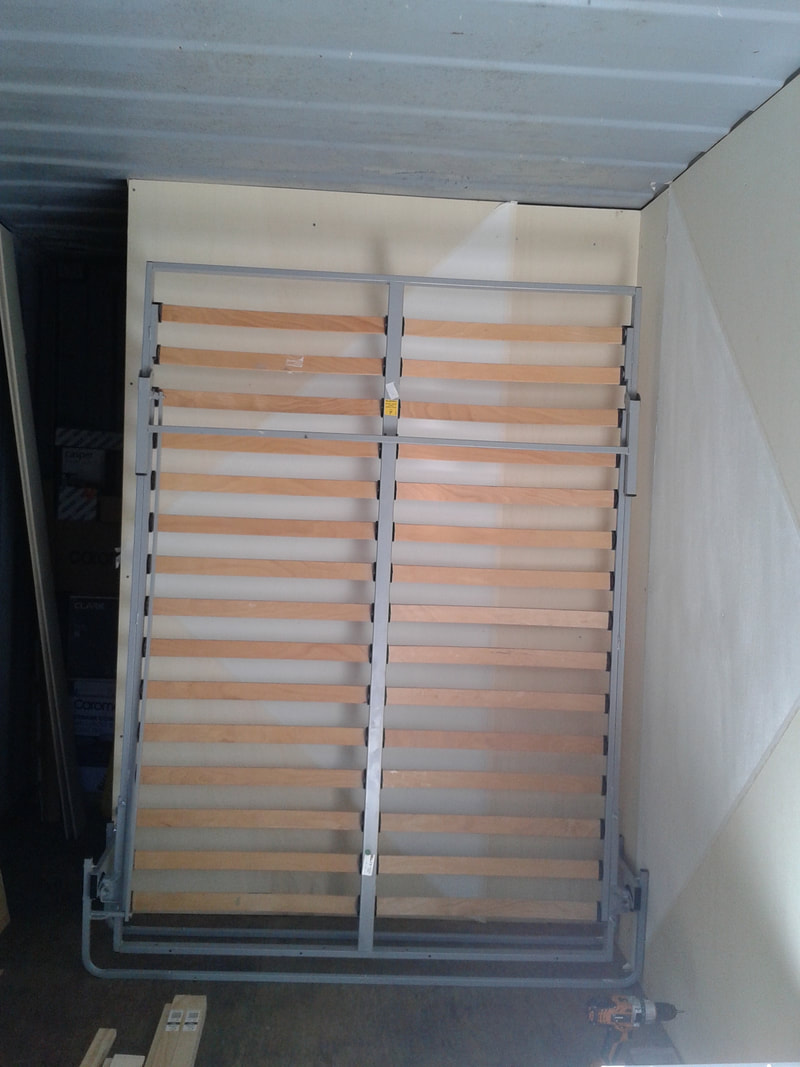
Part 7: InteriorThere are many aspects to the interior fit out of the container, including design, construction phases, fitting of fixtures and installation and placement of furniture, both fixed and movable and these processes will be expounded upon in this and the next few posts. Initially it was essential to determine the best design arrangement for the space. After investigating several interior layout options using computer software programs I developed what I concluded would be the most efficient use of the internal space. I had been donated some large items, specifically a folding wall-bed provided by Pardo Wall Beds and a full sized bath donated by Caroma, which had to be taken into consideration when determining the best design arrangement. These items, along with the equipping of the dwelling with obligatory elements, such as kitchen and additional bathroom fittings and fixtures and other furniture, had to be accommodated to fit acceptably in such a small area to make the space work effectively. The above image illustrates the interior layout design which was ultimately adopted. The design arrangement in the image shows the wall bed in the lowered position. The next step in the interior fitout was to cover the walls. For this process I had been supplied some eco-plywood sheets which were donated to the project by The Elton Group. This plywood sheeting is marketed as an eco-friendly building product known as EPly Pangua Pure Glue. Manufactured from certified plantation grown timber using a soy based adhesive, it contains no added formaldehyde which helps to improve air quality to make a healthier indoor environment. The plywood was supplied in sheets measuring 2440 x 1220 x 9mm. I selected to line only one long wall, the interior of the western wall, and to leave the other, the eastern wall, in its original state. The eastern wall was designated to remain in this condition to reference the container itself and as a gesture of remembrance to its previous appearance and function. A small partition wall at the southern end of the interior area was constructed as a divider to provide additional privacy for the bathroom and was also lined using the plywood sheets. The plywood lining was attached to timber stud framing that had been installed earlier. This covering was then painted in a geometric pattern using white, orange and yellow paints to add colour and visual appeal. Some of this paint was donated to the project by Dulux Paints. Wall Bed The wall bed was installed directly in front of the constructed partition wall. A wall bed is a space saving solution designed specifically for small spaces, they are also known as “Murphy beds”. The bed frame is attached to a spring mechanism and hinged at one end to allow the bed to be lowered for use or raised vertically against the wall when not in use. This is designed to open up more living space, especially in environments were floor space is at a premium. The wall bed mechanism and base in the Container of Dreams is queen sized and was donated to the project by Pardo Wall Beds. It was installed following the manufacturer’s directions by fixing the apparatus to both the floor and wall using screws. The bed frame was then inserted into the device and fastened into position. A queen sized mattress, donated to the project by Ecosa, was secured to the bed frame using straps provided by the bed structure supplier. These straps hold the mattress in position when the frame is being raised or lowered. Next post we will discuss the kitchen area of the conversion. Stay tuned...
1 Comment
Leave a Reply. |
Clare UrquhartCEO and Founder Archives
March 2020
Categories |
"At Container of Dreams, we passionately embrace the belief that everyone should have a home.
Our mission is to turn this motto into reality by providing housing for those without homes."
Container of Dreams Ltd is a registered Charity and Not For Profit Company with Deductible Gift Recipient (DGR) status
ACN 634 440 298 ABN 68634440298
Our mission is to turn this motto into reality by providing housing for those without homes."
Container of Dreams Ltd is a registered Charity and Not For Profit Company with Deductible Gift Recipient (DGR) status
ACN 634 440 298 ABN 68634440298
Proudly powered by Weebly


 RSS Feed